

Ionic 3 Login With Twitter Get User Email Updated FREE
Ionic 3 Login With Twitter Get User Email
Firebase acquired Material a few years ago and mentioned a total integration, information technology hasn't happened yet, once it does, I'll update this.
This article is probably deprecated, Information technology is on my to-do list 🙃
Have you tried to get Ionic Twitter login working with Firebase? There was a alter when Firebase updated to V3 that made all the cool sign-in with popular-up and redirection stop working with Cordova apps. It sucked!
But then I realized something, yes, it sucked for usa as developers, only it pushed us to find a ameliorate way for our users, and information technology was to detect the native plugins.
Why is it improve for our users? Because when you used ionic twitter login in the previous version it had a pop-upwardly to qualify the app, that pop-up was ordinarily a browser one, and the user had to enter their twitter credentials one-half of the time. And that really sucks (I'thousand looking at y'all Instagram!
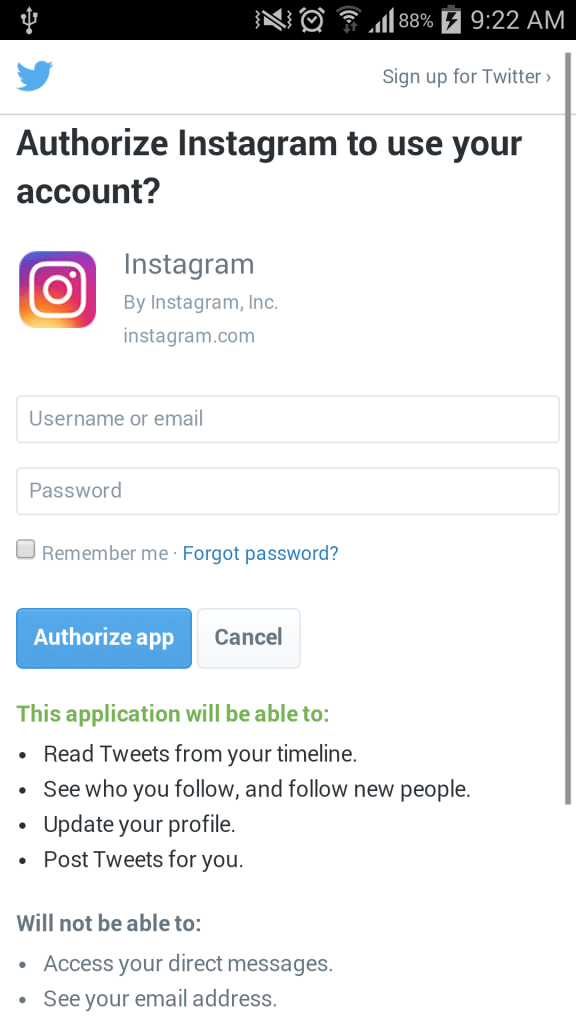
That really sucks, why would I desire to enter my credentials, tin't they only have a cool native pop-upwards and then I can click and authorize it?
Nosotros're going to exist using the twitter-connect plugin and connecting to twitter using the Cloth SDK, that fashion, we can give a native experience to our users, instead of making our users think/do likewise much.
In this post, you'll learn:
- How to set up your Cloth account.
- How to ready the Twitter Connect plugin (from Ionic Native)
- How to use the plugin to get the login token.
- Use those token credentials to sign your user into Firebase.
You'll exist able to give your users a better experience, similar to the picture below:
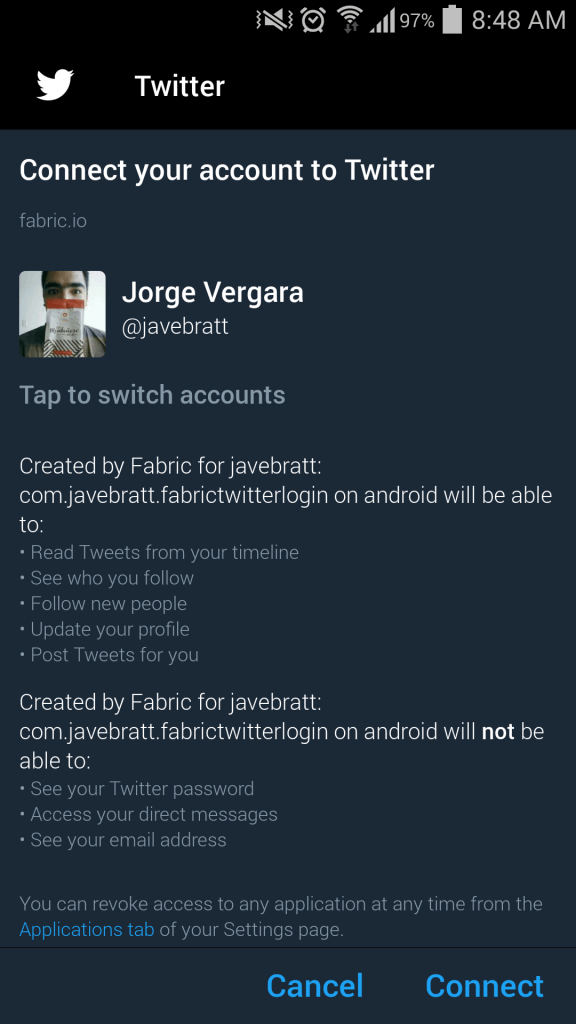
Ready to get started?
Make sure to get the code directly from Github and so you lot tin follow along with the post: https://github.com/javebratt/Ionic-Twitter-Login.
Ionic Twitter Login
We're going to break down the process in half dozen steps:
- Step #1: Gear up your Fabric Account.
- Step #2: Go your Fabric API Cardinal.
- Step #3: Create your app in Fabric.
- Step #iv: Install the Twitter Connect Plugin
- Step #5: Enable Twitter Authentication in Firebase.
- Step #6: Write the lawmaking to get the token from Twitter and sign the user in.
I recall that intro was too long, and so let'southward get busy.
Step #1: Set up your Textile Business relationship
How many times have I said something sucked in this mail service? This is going to be some other 1, this process sucks! :P
There's a lot of work on setting up your fabric account, including running Android Studio (or Xcode) installing plugins, and running a native app.
In the next few lines I'll do my all-time to explicate it so you don't have to bang your head against the keyboard (similar I did).
The kickoff thing you'll do is go to Fabric'southward website and create an business relationship
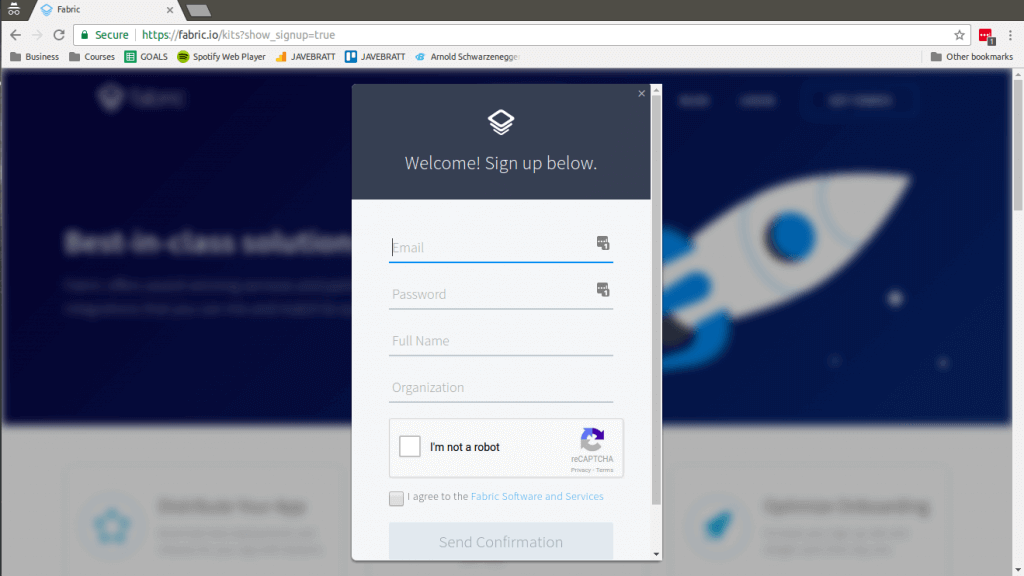
After you signup, they'll ship you a confirmation email so you can get started, go to your e-mail and click on the link they sent y'all.
It will have you to a folio where you can get-go working with Cloth, yous'll add a team name, so information technology will ask y'all what platform you lot're developing for, this is where things become catchy.
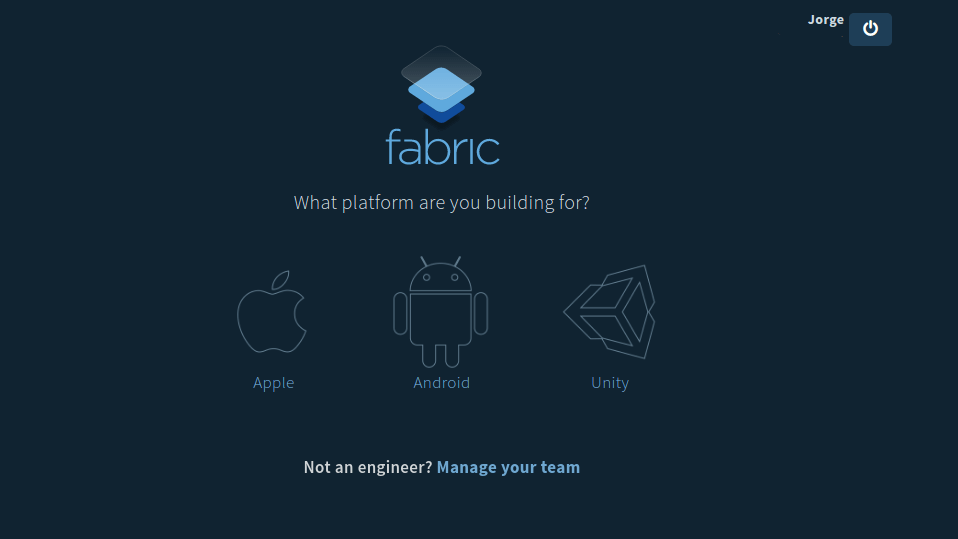
Yous can either select iOS or Android, one little advise, cull the one where you take the SDK and native IDE upwards to date, and then if your Android Studio installation and Android SDK are up to appointment, go ahead and pick android, if not, and then selection iOS.
When you lot pick the platform you'll get through an on-boarding procedure (yup, they really recall this is skilful), only read through every single message and follow the instructions stride by footstep
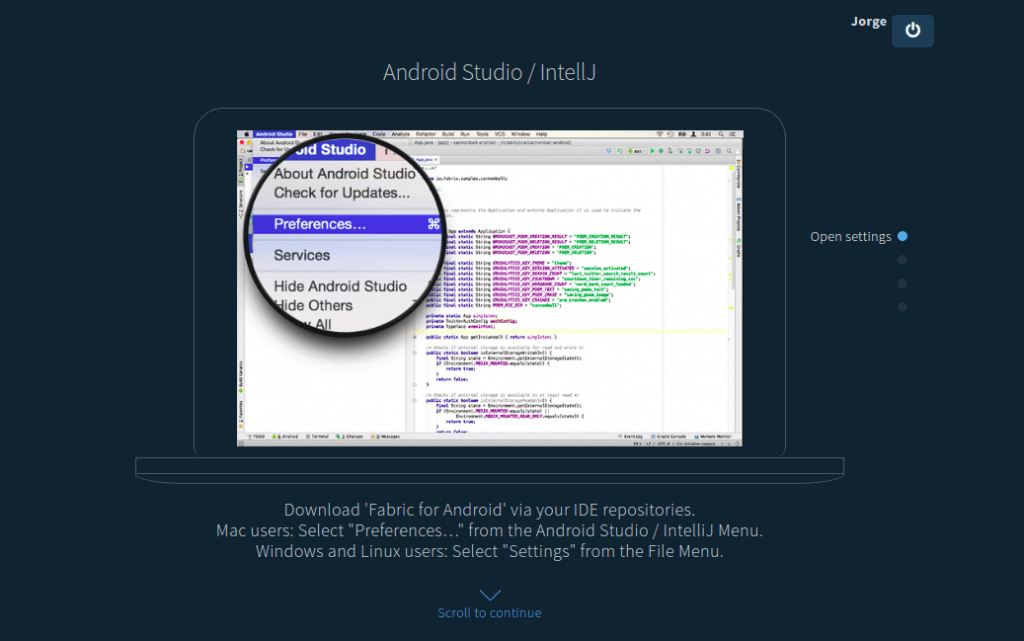
Only basically, you need to install Cloth'south plugin in your IDE, and then install the Twitter SDK into your app through the plugin, the plugin will prove you how to install it, it even has a i-click install that adds everything (at least on Android it does).
Once everything is installed, you need to build and run the app, once you do, information technology volition send a signal to Material letting them know that you have successfully installed and ran the SDK, which will let yous pass this "awaiting" page:
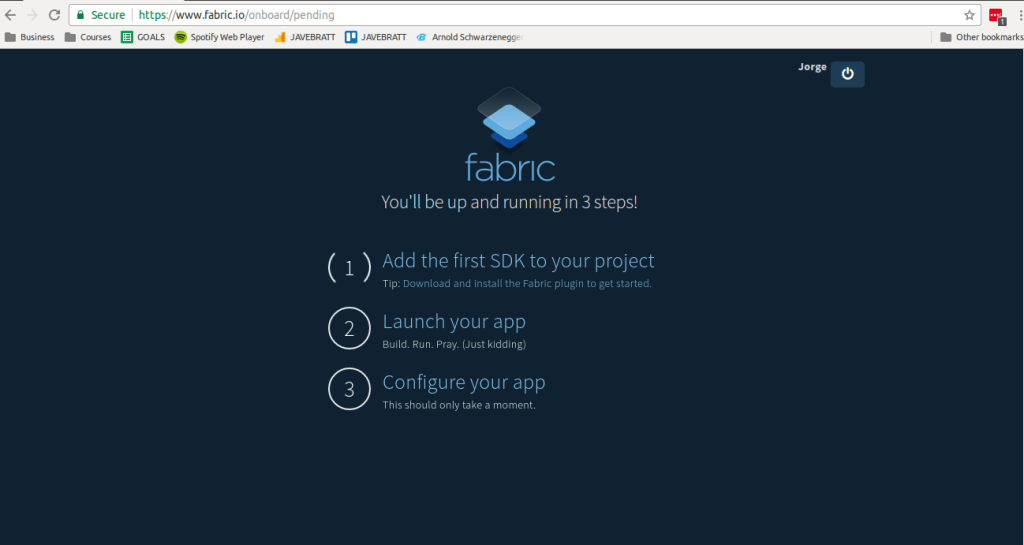
If information technology doesn't happen automatically, experience free to annotate and I'll help yous debug.
Pace #2: Get your Fabric API key
I don't know why, but there's no piece of cake way to go this, similar, I would expect you could go into settings and copy your API key, just no, that'southward not what they wanted I guess.
Thankfully, Manifest Web Pattern, the awesome people that wrote the Twitter Connect Plugin already knew this and they had instructions on how to get your API key.
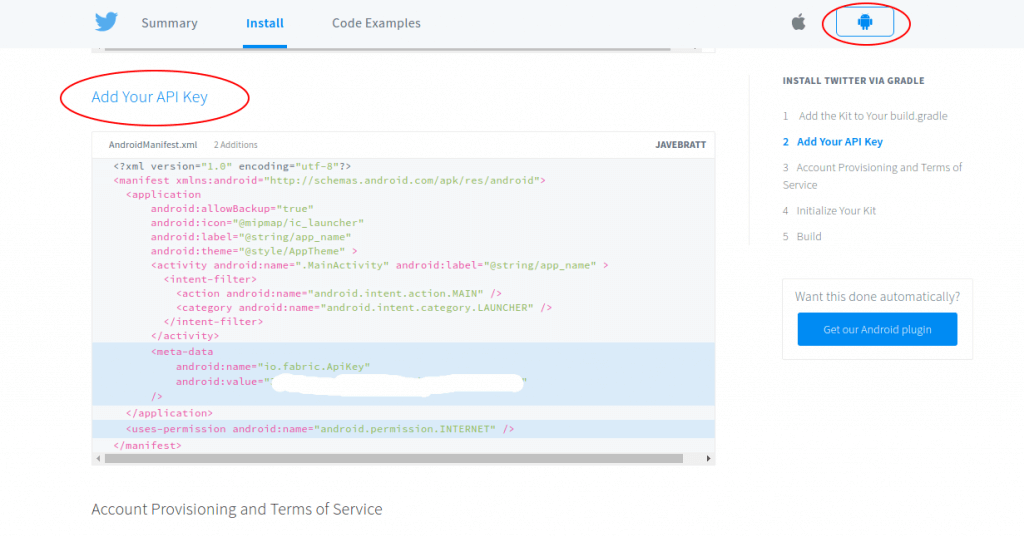
- Get-go, go to https://material.io/kits/android/twitterkit/install.
- Look for the Add Your API Key block of lawmaking
- Inside the
<meta-information />block, you'll detect the value for your Fabric API key.
Easy, right? :P
Pace #iii: Create your Cloth APP
It's time to create the app we'll exist using to ask for the user's permissions, this on the easier side of things, all you have to do is go to https://fabric.io/settings/apps and click the "Add" button, it will ask you for some information and you'll be able to create the app.
The app will have some information on it, yous'll need to copy the CONSUMER KEY and the CONSUMER SECRET, since nosotros'll need them later for the plugin setup.
Step #iv: Install the Twitter Connect Plugin
Now it's time to install the Twitter Connect Plugin, for that we showtime need to accept an Ionic Framework app created, if you lot don't know how to create an Ionic app and initialize Firebase then first read this post and come back to this after you're done.
At present that your app is created, open your terminal (y'all should be inside your app's folder) and install the twitter connect plugin:
ionic plugin add twitter-connect-plugin --variable FABRIC_KEY=<FabricAPIKey> npm install --save @ionic-native/twitter-connect Retrieve to change <FabricAPIKey> with your own API key (the one nosotros got in Pace #2).
Once the plugin is installed, yous'll demand to do some config, get ahead and open up the config.xml file that's in the project root, and correct before the closing </widget> tag, add this:
<preference proper name= "TwitterConsumerKey" value= "<Twitter Consumer Key>" /> <preference name= "TwitterConsumerSecret" value= "<Twitter Consumer Secret>" /> Call back to modify those values with the CONSUMER Primal and the CONSUMER SECRET we got in Step #three when nosotros created the app in Fabric.
We need to declare the twitter-connect package equally a provider in app.module.ts at present:
import { StatusBar } from '@ionic-native/status-bar'; import { SplashScreen } from '@ionic-native/splash-screen'; import { TwitterConnect } from '@ionic-native/twitter-connect'; @ NgModule({ ..., ..., ..., providers : [ {provide : ErrorHandler, useClass : IonicErrorHandler}, StatusBar, SplashScreen, TwitterConnect ] }) export class AppModule {} That'southward it, everything in your app is gear up up and ready to be used.
Step #5: Enable Twitter Authentication in Firebase.
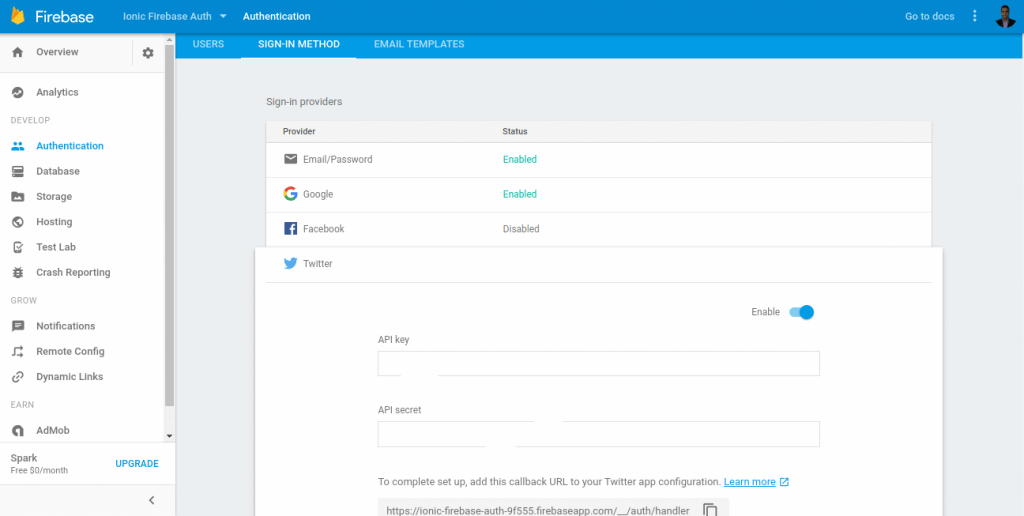
Now you need to tell your Firebase app to allow users to Sign-In with Twitter, for that go to your Firebase Console
Choose your app and inside the Authentication Tab go to "Sign-In Method" and enable Twitter, it'due south going to ask you for an API Fundamental and Surreptitious, yous'll use the same you just used, the ones for the app you created in Fabric.
Footstep #vi: Write the code to become the token from Twitter and sign the user in
We can finally offset coding at present :)
The first thing nosotros'll exercise is create a button and so our user can log-in, so go ahead and open domicile.html and remove the placeholder content, then add together a button:
<ion-content padding> <push ion-button block color = "master" ( click )=" twLogin ()" * ngIf = "!userProfile"> <ion-icon proper noun = "logo-twitter"></ion-icon> Login with Twitter </button> </ion-content> The button is calling a function that we'll create in the Class that will handle the login part, it too has an ngIf tag, that makes sure you but run across the push if you're logged out (we'll create that logic later).
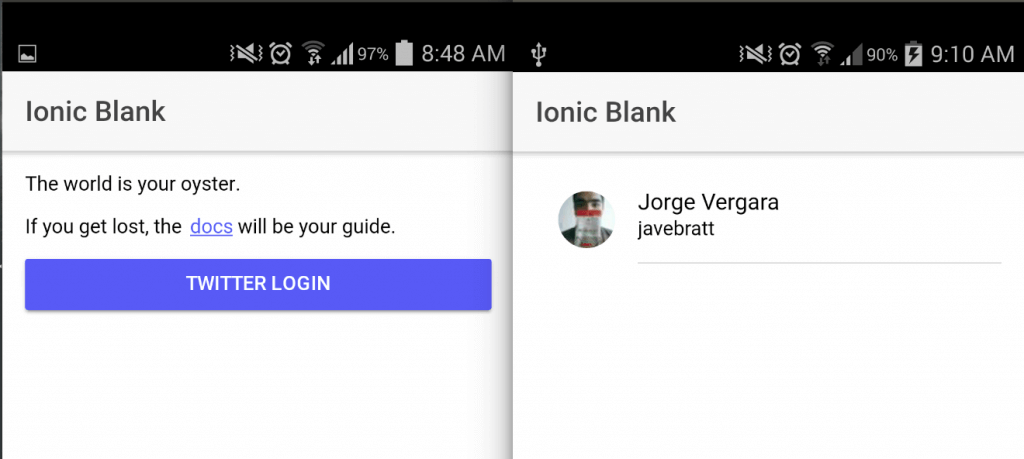
If the user is logged-in, we want to testify the user'southward profile picture, twitter name, and full proper name.
<ion-content padding> <button ion-button block color = "primary" ( click )=" twLogin ()" * ngIf = "!userProfile"> <ion-icon name = "logo-twitter"></ion-icon> Login with Twitter </button> <ion-item * ngIf = "userProfile"> <ion-avatar particular-left> <img [ src ]=" userProfile . photoURL " /> </ion-avatar> <h2>{{ userProfile.displayName }}</h2> <h3>{{ userProfile.twName }}</h3> </ion-item> </ion-content> By the cease, that page will look something similar this:
Now that we accept that part covered, then information technology'due south fourth dimension to import everything we'll need into home.ts
import { Component } from '@angular/cadre'; import { NavController } from 'ionic-athwart'; import { TwitterConnect } from '@ionic-native/twitter-connect'; import firebase from 'firebase'; - Nosotros're importing
TwitterConnectconsidering that's the ionic native package to handle the plugin. - And nosotros're importing Firebase so we can sign-in our users.
So, correct earlier the constructor, we need to add 1 variable:
The userProfile will agree the data we want to show about the user.
Now initialize the zone variable in the constructor and inject TwitterConnect
constructor(public navCtrl : NavController, private twitter : TwitterConnect) {} It's time to move to our login function, nosotros're going to create the function and add the login functionality for twitter, go ahead and add this to your code:
twLogin(): void { this.twitter.login().and so( response => { panel.log(response); }, error => { console.log("Error connecting to twitter: ", error); }); } Right there you'll go all the twitter functionality, go ahead and run it in a telephone, you should see the blue login push, when you click it you'll go a screen like this:
If you're inspecting the device, y'all'll notice it logs the response to the console, the response looks something like this:
{ userName : 'myuser', userId : '12358102', secret : 'tokenSecret' token : 'accessTokenHere' } We need to pass now that token and hush-hush to Firebase so our user can log into our application.
For that commencement, create a credential object using the TwitterAuthProvider method, and and then laissez passer that object to Firebase:
twLogin(): void { this.twitter.login().then( response => { const twitterCredential = firebase.auth.TwitterAuthProvider .credential(response.token, response.secret); firebase.auth().signInWithCredential(twitterCredential) .then( userProfile => {}); }, error => { console.log("Error connecting to twitter: ", fault); }); } We're using
const twitterCredential = firebase.auth.TwitterAuthProvider.credential(response.token, response.clandestine); To create a credential object and so pass it to the signInWithCredential Firebase method, then we just need to handle the return of that office, we'll just add the response to the this.userProfile variable and then we tin use it in our HTML
twLogin(): void { this.twitter.login().so( response => { const twitterCredential = firebase.auth.TwitterAuthProvider .credential(response.token, response.secret); firebase.auth().signInWithCredential(twitterCredential) .then( userProfile => { this.userProfile = userProfile; this.userProfile.twName = response.userName; panel.log(this.userProfile); }, error => { console.log(error); }); }, error => { panel.log("Error connecting to twitter: ", error); }); } We're too calculation this.userProfile.twName = response.userName; because the firebase authentication object doesn't have that information for united states.
And that'south information technology, you lot now accept a fully working hallmark system using Twitter and Firebase :)
Ionic 3 Login With Twitter Get User Email
DOWNLOAD HERE
Source: https://jsmobiledev.com/article/ionic-twitter-login/
Posted by: walkerhemple.blogspot.com
0 Response to "Ionic 3 Login With Twitter Get User Email Updated FREE"
Post a Comment